
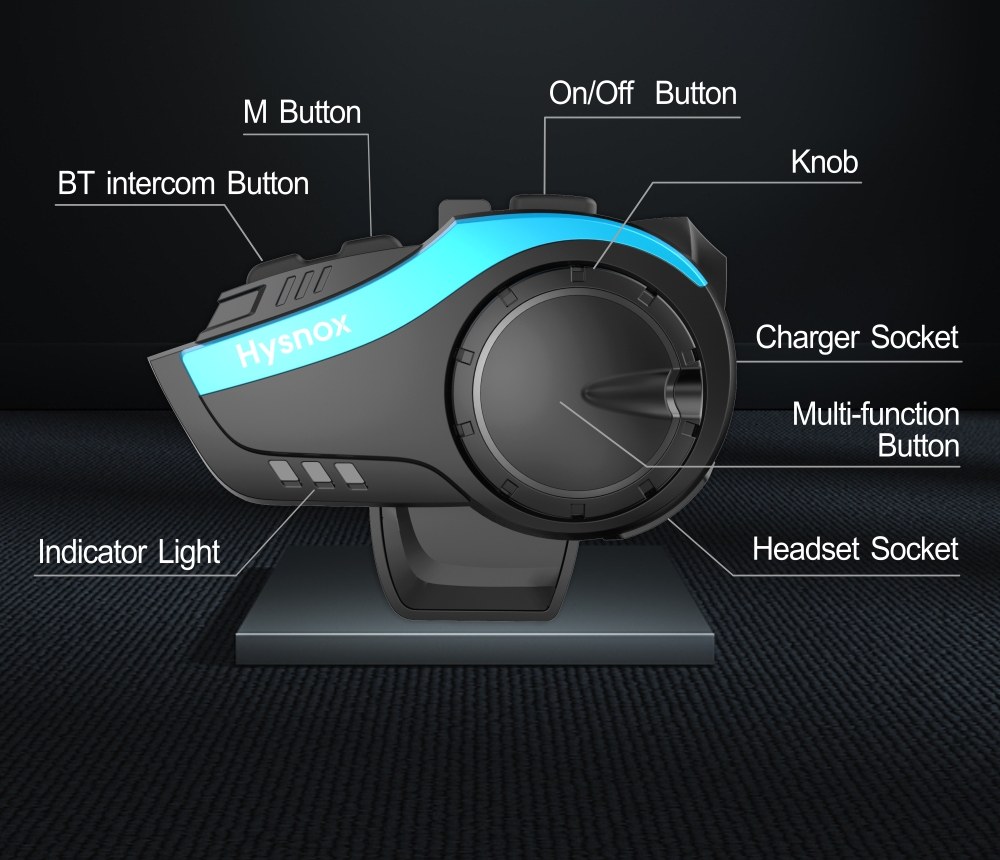
What you get in the box
Every Hysnox intercom ships with the main unit, a clamp mount and an adhesive mount, slim 40mm speakers with hook-and-loop pads, a boom or wired microphone, a USB charging cable and a small screwdriver. You can fit it to a full-face, modular or open-face helmet with the parts in the box — no extra hardware needed.
Step 1 — Charge before you mount
Give the unit a full charge first (about 2 hours over USB / Type-C). A full charge means the pairing and firmware steps below behave predictably, and you will not lose a mount halfway through setup.
Step 2 — Mount the control unit
Loosen the clamp, slide the base between your helmet’s shell and the inner lining on the left side, and tighten. If your helmet has no gap for the clamp, use the adhesive base instead — clean the shell with alcohol, let it dry, then press the base firmly for 20 seconds and leave it 24 hours before riding.
Step 3 — Position the speakers and microphone
Stick the speaker pads inside the ear pockets of the lining, then attach the speakers so they sit directly over your ears. For full-face helmets use the short button microphone near the chin bar; for open-face or modular helmets use the boom microphone positioned a thumb’s width from the corner of your mouth.
Step 4 — Pair with your phone
Hold the multi-function button until the LED flashes red and blue. On your phone, open Bluetooth settings and select the Hysnox device. Once connected you will hear calls, GPS prompts and music straight in your helmet. The unit holds two phones at once, so a pillion’s phone or a separate GPS can stay connected too.
Step 5 — Pair rider-to-rider intercom
Put two units into intercom pairing mode (check your model’s card for the exact button press), hold them close, and they link automatically. Group models step you through adding riders one at a time; mesh models like the SHARK 08 link everyone with a single press. Test the connection in a quiet spot before you rely on it at speed.
Fit and comfort tips
If the speakers feel far from your ears, stack a second pad behind them to bring them closer — this is the single biggest fix for “the volume is too low”. Keep the microphone out of the direct airflow to cut wind noise, and route the cable along the lining seam so it disappears when the helmet is on.
Still stuck?
Every Hysnox model is IP65 sealed, universal-pairing and covered by our returns policy, so you can set it up with confidence. If a step does not behave the way this guide describes, reply to your order email and we will walk you through it.